
Step-by-step Method to Calibrate Camera Screen Brightness for Outdoor Shoots Guide
Here’s the ugly truth about outdoor photography: your camera’s LCD screen is straight-up lying to you. I’ve lost count of the times I stood out in the glaring midday sun, squinted at a backlit display thinking I nailed the exposure, only to get home and realize my shots were a muddy, underexposed mess. Or worse—completely blown out. The culprit? Ambient light. When you’re outdoors, your pupils constrict, and your camera’s tiny screen has to fight against millions of lumens of natural sunlight. Crank it up to max brightness, and you’re just draining your battery while burning your retinas. Trust me on this: guessing your exposure by looking at a shiny glass panel under an open sky is a rookie mistake that will cost you killer shots.
- • Why Your Camera Screen Lies in Direct Sunlight
- • The 4-Step Field Calibration Protocol
- ↳ Step 1: Establish Your Baseline Environment
- ↳ Step 2: Ignore the Image and Trust the Histogram
- ↳ Step 3: Adjust the LCD Brightness to Match Reality
- ↳ Step 4: Lock It Down and Stop Touching It
- • Pro-Tips for Glare-Free Outdoor Monitoring
- ↳ Does increasing camera screen brightness drain the battery faster?
- ↳ Should I use "Auto Brightness" modes outdoors?
- ↳ How do I know if my screen is too bright or too dark?
- ↳ Can I calibrate my camera screen using color calibration cards?
Key Takeaways & Quick Overview
AI Verified
- ✔Step-by-step method to calibrate camera screen brightness for outdoor shoots guide here’s the ugly truth about outdoor photography: your camera’s lcd screen is straight-up lying to you.
- ✔I’ve lost count of the times i stood out in the glaring midday sun, squinted at a backlit display thinking i nailed the exposure, only to get home and realize my shots were a muddy, underexposed mess.
- ✔When you’re outdoors, your pupils constrict, and your camera’s tiny screen has to fight against millions of lumens of natural sunlight.
- ✔Crank it up to max brightness, and you’re just draining your battery while burning your retinas.
Why Your Camera Screen Lies in Direct Sunlight
Cameras are not built for accurate color fidelity under direct sunlight straight out of the box. Most factory defaults sit right around a neutral 3 or 4 out of 10 for brightness. Step outside into a golden hour glow or a harsh noon sun, and that setting becomes entirely useless. You squint. You cup your hands around the back of the body like you’re shielding a dying campfire. Still, you can’t tell if that sky is clipping.
Manufacturers know this is an issue, which is why almost every modern mirrorless and DSLR body features manual brightness overrides. But simply dragging the slider to the maximum isn’t the fix. If you make your screen artificially bright to compensate for the sun, you will instinctively dial back your in-camera exposure to make the image look “correct” on that glowing panel. Boom—you just underexposed your RAW files by two stops. When you load them into Lightroom later, you’ll be swimming in digital noise. To fix this, you need a repeatable, systematic workflow.
The 4-Step Field Calibration Protocol
Over two decades of chasing light across deserts and mountain ranges, I’ve refined a dead-simple method to calibrate my camera screen on location. No expensive hardware colorimeters required—just your eyes, your camera’s internal tools, and a little discipline. Let’s break it down.
Step 1: Establish Your Baseline Environment
Stop trying to calibrate your screen while standing in the middle of an open parking lot. Find shade. Step under a tree, duck behind a vehicle, or use your own body to cast a hard shadow directly across the back of the camera. By eliminating stray surface glare, you give your eyes a fighting chance to judge actual luminance without environmental interference.
Step 2: Ignore the Image and Trust the Histogram
This is where the pros separate themselves from the amateurs. The image on your LCD is a compressed, processed JPEG preview—it is not reality. The histogram, however, is pure math. Before touching your screen brightness, take a test shot of your scene and pull up the RGB histogram. If the graph is slammed against the right side without clipping, your exposure is solid. Period. Memorize what that properly exposed scene looks like on your graph, not on the glass.
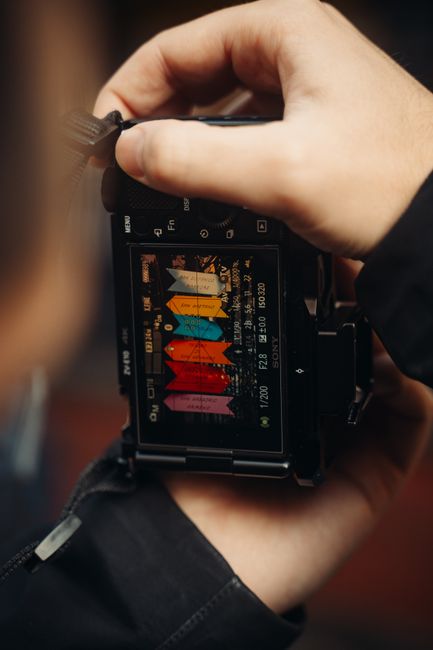
Step 3: Adjust the LCD Brightness to Match Reality
Now that you know your exposure is technically correct via the histogram, look back at the screen while standing in your shaded spot. Go into your camera’s menu system and adjust the monitor brightness up or down until the image on the screen matches what your eyes perceive in that shaded environment. If you’re using advanced gear, you might even reference resources like DPReview exposure guides to understand how different sensor types handle highlight roll-off. For standard field work, though, balancing the preview to the histogram’s reality is your golden ticket.
Step 4: Lock It Down and Stop Touching It
Once you set that brightness level for the ambient lighting condition (e.g., overcast vs. bright sun), leave it alone. Do not readjust your screen brightness every time the sun dips behind a cloud. Consistency is everything. If you constantly fiddle with the slider, your brain loses its baseline reference point, and you’ll end up chasing your tail for the rest of the shoot.
Pro-Tips for Glare-Free Outdoor Monitoring
If you shoot video or do heavy tripod work outdoors, the built-in LCD screen is often just too small to trust entirely. Consider these tactical upgrades:
- Invest in a LCD Viewfinder (Loupe): These snap or mount directly onto your screen, blocking out 100% of ambient side-light and turning your rear screen into an electronic viewfinder experience.
- Use a External Field Monitor: Monitors like those from SmallHD offer daylight-viewable nits (often 1000 to 2000+ nits) that easily overpower the sun.
- Turn on Zebra Striping: Set your highlight warning zebras to 100%. If you see stripes dancing across clouds or bright skin tones, you know instantly—without guessing—that you’re clipping highlights.
For more insights on shooting in protected public lands and managing lighting conditions legally, check out the National Park Service photography guidelines.
Frequently Asked Questions
Does increasing camera screen brightness drain the battery faster?
Absolutely. The LCD backlight is one of the single biggest power draws on a digital camera. Maxing out your screen brightness can cut your battery life by up to 20-30%. Calibrate it to the lowest functional setting required for your current lighting environment to save juice.
Should I use “Auto Brightness” modes outdoors?
Turn it off immediately. Camera auto-brightness sensors rely on tiny ambient light meters that get easily confused by shifting shadows, tree branches moving in the wind, or your own hands blocking the sensor. Manual control is the only way to maintain a consistent reference point.
How do I know if my screen is too bright or too dark?
Always rely on your histogram and highlight alert (blinkies). If your screen makes an image look dark, but your histogram shows pixels crammed against the right wall, your screen is set too dark. Conversely, if the screen makes the image look bright and punchy, but the histogram shows a heavily left-leaning graph, your screen is set too bright and you are heading toward severe underexposure.
Can I calibrate my camera screen using color calibration cards?
While you can use target cards like a ColorChecker to profile your raw files in post-production, in-camera LCD screens generally lack the advanced hardware-level lookup table (LUT) adjustments needed for precise color calibration. Your best bet is always matching visual preview brightness against the histogram.