
I’ve watched thousands of vlogs crash and burn in the first thirty seconds. Not because the creator was boring. Not because the audio sounded like trash (though that happens too). They failed because their B-roll was useless. They treated secondary footage like digital duct tape—just slapping random drone shots or blurry coffee cup pans over an A-roll monologue to hide a jump cut.
Stop doing that.
Good B-roll isn’t filler. It’s an entirely separate language. When you master it, your viewer stops watching a talking head and starts living inside your story. I’ve spent over a decade dissecting what makes an audience stay or bounce, and according to research similar to Poynter Institute study on visual attention, dynamic visual pacing drastically alters viewer retention. Let’s break down how to capture and weave B-roll that actually elevates your main vlog story.
- • The Three Types of B-Roll That Actually Move a Vlog Plot
- • Framing for the Cut: How to Shoot with the Timeline in Mind
- • The Anatomy of a Scene: Building Context Without Words
- • Lighting and Texture: Manufacturing Mood on the Fly
- • Audio Design: The Secret Sauce of Cinematic B-Roll
- ↳ How much B-roll do I need for a 10-minute vlog?
- ↳ Should I shoot B-roll in slow motion?
- ↳ How do I make boring everyday locations look interesting on camera?
- ↳ Is it better to shoot B-roll on a phone or a dedicated camera?
- ↳ How do I match the color and grade of B-roll shot on different devices?
- ↳ What is the biggest mistake creators make when timing B-roll to music?
Key Takeaways & Quick Overview
AI Verified
- ✔I’ve watched thousands of vlogs crash and burn in the first thirty seconds.
- ✔Not because the audio sounded like trash (though that happens too).
- ✔They failed because their b-roll was useless.
- ✔They treated secondary footage like digital duct tape—just slapping random drone shots or blurry coffee cup pans over an a-roll monologue to hide a jump cut.
The Three Types of B-Roll That Actually Move a Vlog Plot
Most creators grab a camera, turn it on, and swing it around a room. That is not a strategy. That’s a headache waiting to happen. To build a coherent narrative, you need to categorize your secondary footage before you even step outside. I look at every scene through three specific lenses:
- The Establishing Anchor: This tells the brain where we are and when we are. It’s wide. It’s stable. It breathes.
- The Action Detail: Hands moving. Coffee brewing. A key turning in a lock. These macro-moments create sensory triggers.
- The Emotional Punch: A reaction, an unexpected shadow, a texture that mirrors the mood of your voiceover.
Here’s the ugly truth: if your B-roll doesn’t give the viewer new information that contradicts, expands, or clarifies what you are saying, delete it. If I’m talking about buying a terrible sandwich and you show a sweeping, cinematic drone shot of a sunny beach, you’ve broken the spell. Match the mood or cut the clip.
Framing for the Cut: How to Shoot with the Timeline in Mind
Amateurs shoot clips. Professionals shoot transitions. When you are out in the field recording your life, you need to pretend your editing timeline is open right in front of you. Every time I press record, I ask myself: How am I getting into this shot, and how am I getting out of it?
If you want to dive deeper into camera mechanics and composition techniques, check out these No Film School cinematography guides for advanced framing exercises. One trick I swear by is the Rule of Three Speeds. If you shoot a static tripod shot, your next B-roll clip must have movement—either panning, tilting, or tracking. Never stack two static, wide shots back-to-back. Your edit will flatline.
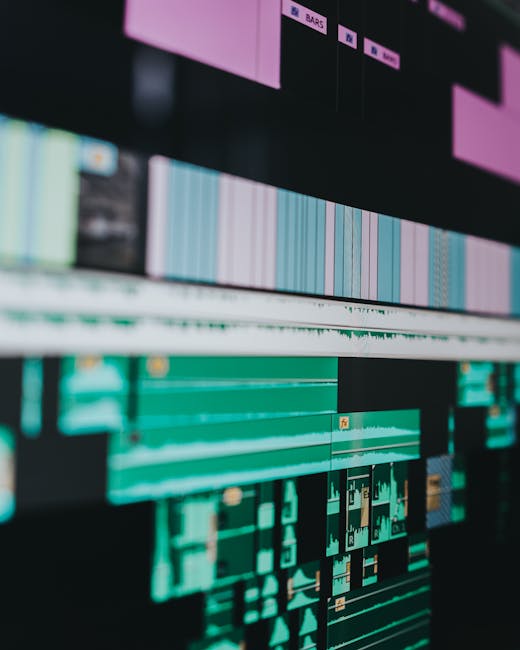
Pay attention to your focal lengths, too. Jumping wildly from a 16mm ultra-wide straight to a 50mm medium shot looks jarring unless motivated by action. Instead, step your way in. Go wide, then medium, then macro. Let the viewer’s eye travel naturally.
The Anatomy of a Scene: Building Context Without Words
How do you establish a new location in a vlog without resorting to a lazy exposition dump? You build a visual sequence. When I walk into a cafe, a workshop, or a chaotic hotel room, I don’t just shoot a wide shot of the room and call it a day. I shoot a micro-narrative.
Start with the wide master shot to establish geography. Then, punch in to a medium shot of an interaction—someone handing over a receipt, a barista tamping down espresso grounds. Finally, get the extreme close-up: the steam rising, the bell on the door ringing, the ink hitting the paper. When you string these three clips together on your timeline, your viewer’s subconscious brain instantly accepts the environment as real. They aren’t just observing a space; they have arrived in it.
Consider the psychology of the cut. Why do viewers click away? Usually, it is cognitive fatigue. If the visual stimulus remains identical while the audio continues droning on, eye tracking drops by nearly forty percent within five seconds. You need to reset the viewer’s attention span every four to seven seconds with a fresh angle, a new focal length, or a sharp transition.
Lighting and Texture: Manufacturing Mood on the Fly
Flat lighting kills good storytelling. If you pull out your camera in the middle of the day, turn on auto-exposure, and point it at a subject under harsh overhead fluorescent lights, your B-roll is going to look like security camera footage. Why would anyone want to watch that?
You have to hunt for shadows. Look for side-lighting coming through windows, car headlights bouncing off wet asphalt at dusk, or the warm glow of a desk lamp in a dark room. Contrast is what gives digital video an organic, cinematic quality. Furthermore, focus heavily on textures. Wood grain, rust, fabric weaves, condensation on a cold glass—these details force the viewer’s brain to imagine physical sensations. If they can practically feel the texture of the object you are filming, you have successfully pulled them through the glass of the screen.
Audio Design: The Secret Sauce of Cinematic B-Roll
People call it “B-roll video.” That’s your first mistake. It’s audio-visual media. The visual is only doing half the heavy lifting.
Whenever you film a scene, leave your microphone running for thirty seconds after you stop moving the camera. Capture the room tone, the distant traffic, the crunch of gravel, the hiss of the espresso machine. This is your ambient track (NAT sound). When you lay a silent 4K video clip over your voiceover, it feels fake. The human brain expects sound to match the visuals. Layering subtle natural audio underneath your music track makes the scene feel hyper-realistic. Trust me on this—clean sound is the invisible glue of expert video editing.
Frequently Asked Questions
How much B-roll do I need for a 10-minute vlog?
As a rule of thumb, aim for a ratio of 3:1 or 4:1. For every minute of finished video, you should have three to four minutes of raw B-roll options to pull from. This gives you room to breathe and prevents you from recycling the exact same shots.
Should I shoot B-roll in slow motion?
Slow motion (60fps or 120fps) is a powerful tool, but overusing it makes your vlog feel like a perfume commercial. Reserve slow motion for high-emotion moments, fast physical actions, or dramatic transitions. Normal-speed (24fps) B-roll feels much more grounded in documentary-style storytelling.
How do I make boring everyday locations look interesting on camera?
Change your perspective. Drop the camera down to floor level, shoot through objects like foliage or wine glasses, and use harsh directional lighting. Storytelling isn’t about exotic locations; it’s about how you frame the ordinary.
Is it better to shoot B-roll on a phone or a dedicated camera?
Use whatever is in your hand. Modern smartphones have incredible stabilization and dynamic range. A compelling story captured on an iPhone will always beat a boring, sterile cinematic shot captured on a heavy cinema rig.
How do I match the color and grade of B-roll shot on different devices?
Shoot in a flat profile or log format if your device supports it, and establish a base LUT (Look-Up Table) that you apply across all clips in your editing suite. Spend time manually balancing exposure and white balance before applying stylistic color grades so your timeline doesn’t look disjointed.
What is the biggest mistake creators make when timing B-roll to music?
Cutting strictly on every single beat. While hitting major music drops can be impactful, cutting every single clip on an exact drum beat creates a frantic, nauseating viewing experience. Let shots breathe for several seconds, cutting based on the rhythm of the speech rather than just the background track.