
Step-by-step Guide: Setting Up a Compact Home Vlogging Studio Guide
Here’s the ugly truth about building a vlogging studio: most advice online is written by people who live in sprawling suburban houses with dedicated spare rooms. If you are trying to squeeze a professional content creation setup into a cramped apartment bedroom, a tiny home office, or a converted closet, standard studio advice is completely useless. I’ve spent the last decade tearing down gear, moving across tiny urban apartments, and rebuilding setups from scratch. Trust me on this—you do not need a massive space to look and sound like a broadcast professional. You just need ruthless optimization. Let’s build a compact studio that punches way above its weight class.

- • Phase 1: Real Estate and Spatial Triage
- • Phase 2: The Audio-First Imperative
- • Phase 3: Lighting Tactics for Tight Quarters
- • Phase 4: Camera Gear and Ergonomics
- • Phase 5: The Test Run and Iteration
- ↳ Can I set up a vlogging studio in a bedroom without it looking messy?
- ↳ What is the best lighting for a very small vlogging space?
- ↳ How do I stop echo in a small room studio?
- ↳ Do I need an expensive camera for a compact home studio?
Key Takeaways & Quick Overview
AI Verified
- ✔Step-by-step guide: setting up a compact home vlogging studio guide here’s the ugly truth about building a vlogging studio: most advice online is written by people who live in sprawling suburban houses with dedicated spare rooms.
- ✔If you are trying to squeeze a professional content creation setup into a cramped apartment bedroom, a tiny home office, or a converted closet, standard studio advice is completely useless.
- ✔I’ve spent the last decade tearing down gear, moving across tiny urban apartments, and rebuilding setups from scratch.
- ✔Trust me on this—you do not need a massive space to look and sound like a broadcast professional.
Phase 1: Real Estate and Spatial Triage
Before you spend a single dime on gear, look at the corner you’ve designated for your channel. The biggest mistake beginners make is facing the center of the room. Don’t do that. You want your desk pushed right up against a wall, facing outward. Why? Because background depth is the cheapest production value hack in existence. If your subject is plastered directly against the wall behind you, the image looks flat. If you can push your camera back even three feet, you create natural background compression—especially if you’re using a fast prime lens.
Clear the clutter. Vlogging in a messy room instantly kills perceived authority. But don’t buy fake bookshelves just yet. Instead, pick one focal wall. Keep it clean. Add a single accent light or a subtle plant. Remember, your physical footprint is tiny, so every square inch visible on camera must be intentional. If you can’t walk past your desk without knocking over a light stand, the setup fails.
Phase 2: The Audio-First Imperative
People will forgive a slightly grainy 1080p image. They will click away within two seconds if your audio sounds like you’re broadcasting from inside a galvanized steel bucket. Audio is fifty percent of the visual experience. In a small room, sound waves bounce off hard floors, bare walls, and glass windows like pinballs. This creates muddy, boomy echo that ruins even the most expensive microphone.
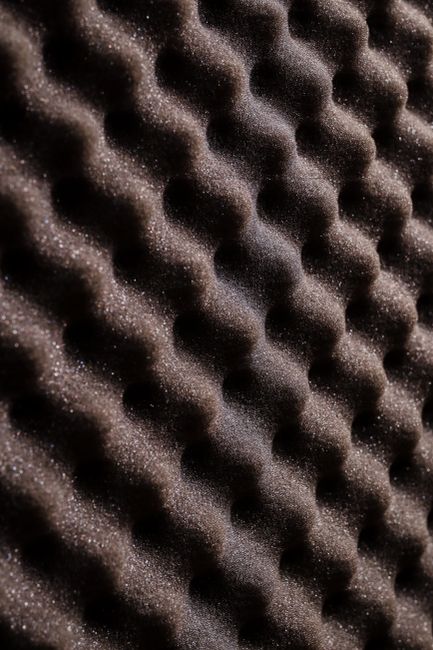
Skip the bulky floor-standing boom arms. Get a heavy-duty, low-profile desk mount arm that clamps to the back of your workspace. Pair it with a quality condenser or dynamic mic, and position it just out of frame, angled toward your mouth. If your room is particularly echoey, look into basic acoustic treatment guidelines provided by standards organizations like ISO for workspace acoustics. You don’t need to cover every wall in foam. Just target the primary reflection points: directly to your left, your right, and behind your monitor.
Phase 3: Lighting Tactics for Tight Quarters
Forget massive softboxes. In a ten-by-ten-foot room, a standard thirty-inch softbox eats up valuable breathing room and turns your studio into a literal sauna. You need compact, high-output LED panels or bi-color bars that mount directly to your desk or clip onto shelves.
Here is the exact lighting triangle I use in my own compact studio:
- The Key Light: Placed at a 45-degree angle to your face, slightly elevated, pointing down. Use a small diffusion dome to keep the light soft without taking up excess floor space.
- The Fill/Rim Light: Instead of a second front light, use a small LED tube light mounted vertically behind you or clamped to a bookshelf to kick a subtle edge light onto your shoulder. This separates you from the background instantly.
- Window Management: Natural light is free, but it’s wildly unpredictable. Blackout curtains are non-negotiable. Control your environment so your lighting looks identical at 8:00 AM and 8:00 PM.
Phase 4: Camera Gear and Ergonomics
You don’t need a cinema rig that weighs twenty pounds. A mirrorless body paired with a wide, sharp prime lens (think 16mm or 24mm) gives you a cinematic field of view even when your camera is only three feet away from your face. Mount the camera to a sturdy desk clamp rather than a tripod. Tripod legs are absolute toe-stubbers in a tight room.
Cable management will make or break your sanity. When your studio is compact, loose cables look like a chaotic spiderweb on camera and in person. Invest in split-sleeve cable tubing, Velcro ties, and under-desk trays. Every single wire should run cleanly down the back leg of your desk. For power management, ensure your gear complies with electrical safety standards—you can check regional compliance guidelines via agencies like the Federal Communications Commission if you’re pulling heavy power loads through multiple multi-taps.
Phase 5: The Test Run and Iteration
Record a five-minute test video. Walk away. Do not watch it immediately. Go grab a coffee, come back, and watch it with the sound off first. Does the framing look balanced? Is the lighting flattering? Now, close your eyes and just listen. Can you hear computer fan noise? Is there a low hum from your lights? Fix these issues now before you shoot your actual content.
A compact studio isn’t a compromise; it’s a discipline. It forces you to be intentional about every single gear choice. Keep refining, keep trimming the fat, and start creating.
Frequently Asked Questions
Can I set up a vlogging studio in a bedroom without it looking messy?
Absolutely. The secret is keeping your bed completely out of the camera’s field of view. Use a room divider, a solid-color backdrop curtain, or angle your desk so it faces a clean, minimalist corner or accent wall.
What is the best lighting for a very small vlogging space?
Compact LED panels with built-in diffusion or small ring lights mounted directly to your desk are ideal. Avoid large softboxes that take up precious floor space.
How do I stop echo in a small room studio?
You don’t need professional soundproofing to fix echo. Hang heavy blankets, position a bookshelf filled with books behind your mic to scatter sound, or use budget-friendly acoustic foam tiles on primary reflection points.
Do I need an expensive camera for a compact home studio?
No. Many modern smartphones and entry-level mirrorless cameras shoot exceptional 4K video. Lighting and audio matter far more than the sensor size of your camera.