
Step-by-step Guide: Basic Video Editing Workflow for Daily Vloggers
Here’s the ugly truth about daily vlogging: the camera work is the easy part. You press record, you ramble to a lens for twenty minutes, you go home. Boom. Done. But then the sun sets, your coffee goes cold, and you stare at a blank Adobe Premiere Pro or DaVinci Resolve timeline like it owes you money. I’ve watched countless aspiring creators burn out in month one simply because their video editing workflow was an unorganized mess of chaos. They spend six hours editing a ten-minute vlog, sleep three hours, and wonder why their channel is flatlining. I’ve been in the trenches for over a decade. I’ve edited thousands of videos. Trust me on this: speed isn’t about working frantically. It’s about building a rigid, repeatable assembly line.

- • Step 1: The Fast Ingest and The 1-To-1 Folder Hierarchy
- • Step 2: Rough Assembly—The "Kill Your Darlings" Phase
- • Step 3: The Tightening Process and Audio First Aid
- • Step 4: Color Grading and the Magic of Adjustment Layers
- • Step 5: Sound Design, Pacing, and The Hook
- • Step 6: Export Presets and The Post-Mortem
- ↳ How long should a daily vlog editing workflow take?
- ↳ What is the best software for beginner daily vloggers?
- ↳ Should I edit my own vlogs or hire an editor?
- ↳ How do I stop spending too much time on color grading?
Key Takeaways & Quick Overview
AI Verified
- ✔Step-by-step guide: basic video editing workflow for daily vloggers here’s the ugly truth about daily vlogging: the camera work is the easy part.
- ✔You press record, you ramble to a lens for twenty minutes, you go home.
- ✔But then the sun sets, your coffee goes cold, and you stare at a blank adobe premiere pro or davinci resolve timeline like it owes you money.
- ✔I’ve watched countless aspiring creators burn out in month one simply because their video editing workflow was an unorganized mess of chaos.
Step 1: The Fast Ingest and The 1-To-1 Folder Hierarchy
Stop dumping your SD card straight onto your desktop. Just stop. That’s amateur hour, and it’s how you accidentally delete half your B-roll because you dragged the wrong folder into the recycling bin. When you walk through your front door with tired legs and a camera bag full of gear, your organizational system needs to protect you from your own exhaustion.
Create a strict template on your scratch drive. Every single day, your folder structure should look identical:
- 01_Footage (A-cam, B-cam, drone shots)
- 02_Audio (External mic recordings, scratch tracks)
- 03_Assets (Graphics, logos, fonts, watermarks)
- 04_Music (Licensed tracks split into upbeat, ambient, and dramatic)
- 05_Exports (Final renders and thumbnail grabs)
Drop your files into these buckets *before* you touch your editing software. Back up your raw footage to an external drive if you have the storage space, but keep your active project files on a fast NVMe SSD. If your timeline stutters, your brain stutters. Keep it snappy.
Step 2: Rough Assembly—The “Kill Your Darlings” Phase
Now comes the hardest part of the process. You have to watch your own footage. Most beginners try to edit as they go—they drop a clip, add a transition, color grade it, slap on a sound effect, and then realize two hours later they’ve only edited forty-five seconds of the video. Big mistake.
Enter the rough cut. This is where you bring every single usable clip down to your timeline in chronological order. Don’t worry about pacing yet. Just drag and drop. Once the whole mess is sitting there on your screen, play it through at 1.5x speed and start hacking away the dead air. Did you stutter for six seconds trying to explain where you were going for lunch? Delete it. Did you leave the lens cap on while talking about the weather? Gone.
Think of your daily vlog as a sculpture. The raw footage is a massive, jagged block of marble. The rough cut is taking a sledgehammer to everything that doesn’t look like a story. By the time you finish this phase, your twenty-minute mess should be whittled down to a brisk eight to twelve minutes. No fancy effects allowed. Just the raw, bleeding narrative.
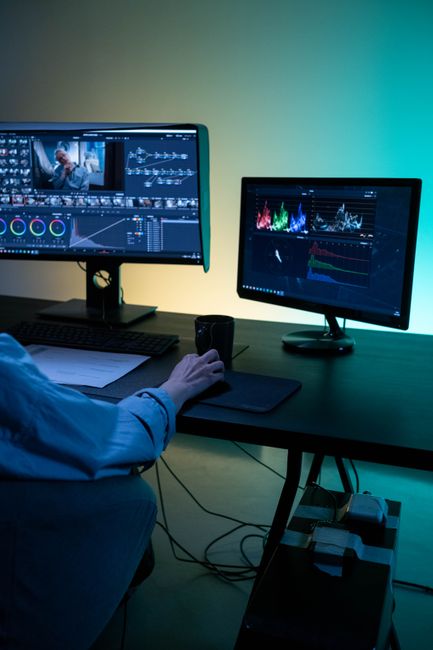
Step 3: The Tightening Process and Audio First Aid
Audio is fifty percent of your video. Actually, let’s be honest: bad video with great audio can go viral. Great video with garbage audio gets closed in three seconds. People have zero patience for muffled room echo or sudden volume spikes when you laugh.
Before you even think about color correction or memes, clean up your tracks. Apply a subtle high-pass filter to remove low-end rumble (like air conditioners or traffic). Use a gentle compressor to even out your voice. If your levels are peaking in the red, pull them down to hover around -12dB to -6dB.
Once the audio is pristine, tighten the video cuts to match the rhythm of your speech. Cut out the micro-pauses between sentences. Modern viewer retention demands a jump or a visual shift every two to four seconds. That doesn’t mean you need crazy zoom-ins and sound effects on every single word—it just means there shouldn’t be three seconds of dead air while you take a breath.
Step 4: Color Grading and the Magic of Adjustment Layers
You don’t need a Hollywood cinema LUT to make a daily vlog look good. In fact, heavy-handed turquoise-and-orange grades usually look terrible on natural skin tones. Keep it clean, keep it fast, and keep it consistent.
Drop an adjustment layer across your entire timeline. This is your safety net. Apply your basic corrections here—exposure balancing, contrast adjustments, and a subtle color grade that matches your channel’s visual identity. If you shot in a flat profile (like Log or Cine), apply your technical conversion LUT first, then tweak the exposure underneath it.
If you have specific scenes shot in wildly different lighting conditions (say, bright midday sun turning into dim indoor restaurant lighting), fix those clips individually *before* applying the master adjustment layer. Consistency is what separates a professional daily vlogger from an amateur phone-uploader.
Step 5: Sound Design, Pacing, and The Hook
Music sets the emotional temperature of your vlog. Choose your tracks wisely, and map out where the beats drop *before* you finalize your cuts. If you’re riding a bike through traffic, the music should build tension. When you finally sit down at a cafe with a pastry, the track should shift to something breezy and acoustic.
Don’t forget Foley and sound design. Wooshes for transitions, subtle keyboard clicks when showing a screen, paper rustling—these micro-sounds trick the human brain into staying engaged. But remember: subtlety is key. If your sound effects are louder than your voiceover, you’ve gone too far.
Finally, look at the first five seconds of your video. This is your hook. If your vlog starts with a twenty-second cinematic drone shot of your street while you slowly fade in title cards, your audience has already clicked away to TikTok. Start mid-sentence. Start with the most dramatic, funny, or weird thing that happens in the video. Earn their attention immediately, then flash your intro title if you even use one.
Step 6: Export Presets and The Post-Mortem
You’re at the finish line. Do not rush the export. Nothing hurts worse than waiting an hour for a render only to realize you left a placeholder clip in the middle of the video or misspelled a subtitle.
Save out a reliable export preset—usually H.264 or H.265 (HEVC), matching your source frame rate (typically 24fps or 30fps), encoded at a bitrate that keeps file sizes manageable for YouTube upload speeds without crushing your gradients. 1080p at 10-15 Mbps or 4K at 45-65 Mbps usually hits the sweet spot for web delivery.
Once it exports, watch the final file from start to finish on a different device if possible—your phone or a secondary monitor. Catching that one stuttering audio glitch right before you publish will save you a headache and an embarrassing re-upload.
Frequently Asked Questions
How long should a daily vlog editing workflow take?
If you have your templates, hotkeys, and folder structures dialed in, a standard daily vlog shot over 8 hours should take no more than two to three hours to edit. If you are spending five hours editing every single day, your workflow is bloated, or you are over-editing.
What is the best software for beginner daily vloggers?
DaVinci Resolve offers a shockingly powerful free version that includes industry-standard color grading and fairlight audio tools. If you have the budget, Adobe Premiere Pro is the industry standard for fast timeline manipulation and seamless integration with Photoshop and After Effects.
Should I edit my own vlogs or hire an editor?
If you aren’t making enough revenue to cover an editor’s rate without going into debt, you must edit your own videos. Furthermore, editing your own early vlogs teaches you how to shoot *for* the edit. You learn quickly what wastes time on the timeline so you stop filming it in the first place.
How do I stop spending too much time on color grading?
Use pre-made adjustment layers or saved grading templates. Color grading should be the seasoning on your meal, not the meal itself. If your lighting was decent on set, grading should take less than ten minutes total.